From Windows to Linux, Part 4: Devices & Drivers
Our tutorials on Windows to Linux migrations are slowly getting progressively more complex. We started with the office applications, a well familiar field, continued with media codecs and software, and finished with the third article, which covered the gaming side. Now, we will jump into the realm of drivers and devices.
But there’s more. Unlike the previous three guides, in this one, I am going to show you not just how easy the transition is, and how successful you can be when you follow all the steps, I am also going to demonstrate failure. Not always is the migration simple or worth your time. And sometimes, despite your best efforts, you might fail. The important lesson is not to despair when this occurs, as we shall soon see. Once again, we will be using a different distribution for our testing. Today, openSUSE.
Devices & Drivers in a nutshell
As a Windows user, you want to start hooking your stuff into your Linux box. You have expensive hardware and peripherals, and you want it all to work nicely. You want to spend a few hours installing drivers so that your electronics come to life. That’s what you need. And you must approach this challenge with a free, empty mind.
The last three tutorials should have given you some insight into how things work in Linux, but if you have missed the idea, here’s a quick recap. You manage software from centralized, secure, digitally signed application stores, very much like those on mobile devices, and no, Linux did not steal that from Android or iOS, on the contrary. Linux comes with a rich arsenal of drivers out of the box, so there’s a good chance you won’t be needing any installs. Moreover, most flavors of Linux run from live CD or USB, which means you can boot your system from these external devices, check the Linux compatibility with your hardware, and only then decide whether you want to install the particular distro.
In some cases, everything will work smoothly. In others, things might stutter, even many years after the hardware has been introduced to the market. Do not be surprised when this happens. Even in the Windows world, there are many software and hardware conflicts, and just because something is new does not mean it should fix all your old problems.
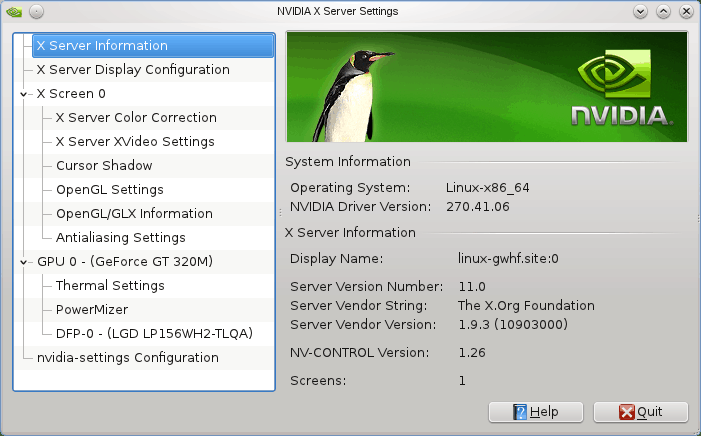
Drivers for Linux can be installed in many ways. But it is always best to use the official sources, the repositories, mark the correct drivers and let them auto-install. A good example is the Nvidia setup, which I have demonstrated many times before, and which we will soon cover once again. Manual setups are quite tricky but doable. Now, let’s start.
External devices
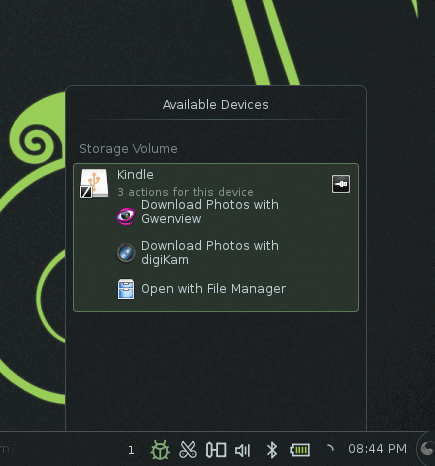
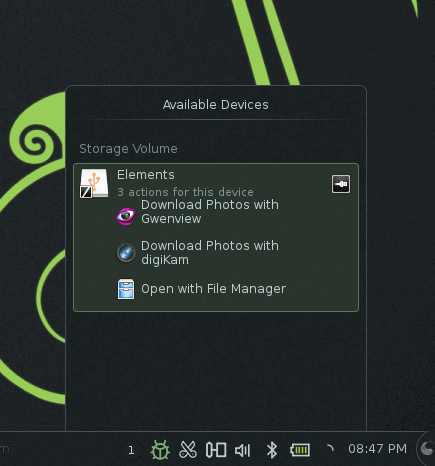
Say you have some gadgets, a smartphone, an e-book reader, a handful of external hard disks. You want to use them in Linux. No problem. Just connect them. There is a very good chance they will be auto-detected and auto-mounted. This last part means that the devices will show up in your system and be accessible for use.
OpenSUSE is a good candidate for this exercise. It is another popular distribution, and it does things ever so slightly differently from Fedora, Mint, Ubuntu, and friends. This will expose you to yet another way of managing software, and we will be using the zypper command line package manager, which we have not seen before. In essence, it’s all the same, but still.
Anyhow, with the KDE version, when you hook new devices, the system will notify you about that. I’m betting most of your smartphones, digital cameras, e-book readers, external disks, thumb drivers, and smart cards will be detected without any problem whatsoever. Here’s a quick demo: Kindle and WD Elements 1TB external USB 3.0 disk.
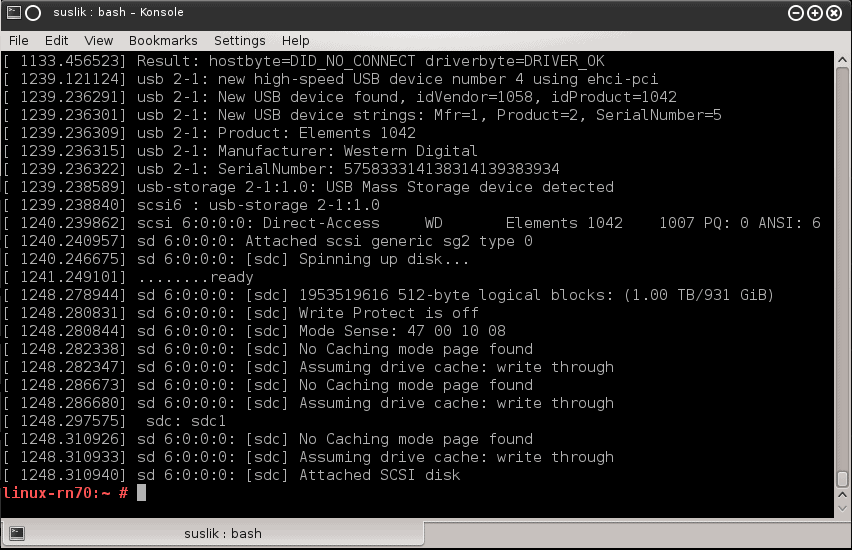
Now, on the command line, you might be interested in some extra detail. Indeed, the dmesg command will show you the last messages from the kernel log. This allows you to see whether your devices are properly identified and initialized. And if they are not, then you can use the error messages for further Internet searches.
Proprietary drivers
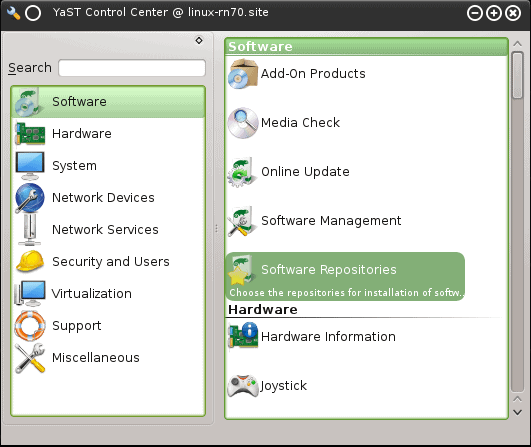
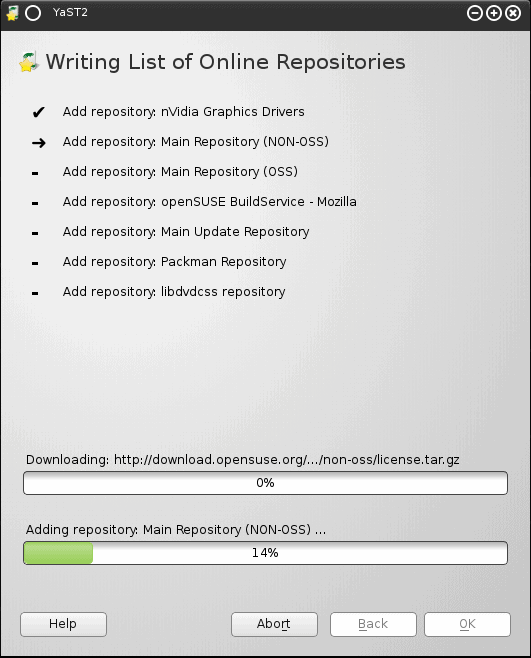
Now, let’s do something more interesting. Install Nvidia drivers. But you won’t find those right away in the SUSE repositories. Due to their proprietary nature, they do not ship with the distro, so you will have to enable additional sources. Much like we did in Fedora. Just so you know, Ubuntu and Mint don’t have this niggle. Anyhow, I have outlined all these steps in a dedicated Nvidia tutorial a long time ago, but let’s walk through the exercise once again. First, open YaST, the SUSE command & control module that lets you do everything. Click on Software Repositories.
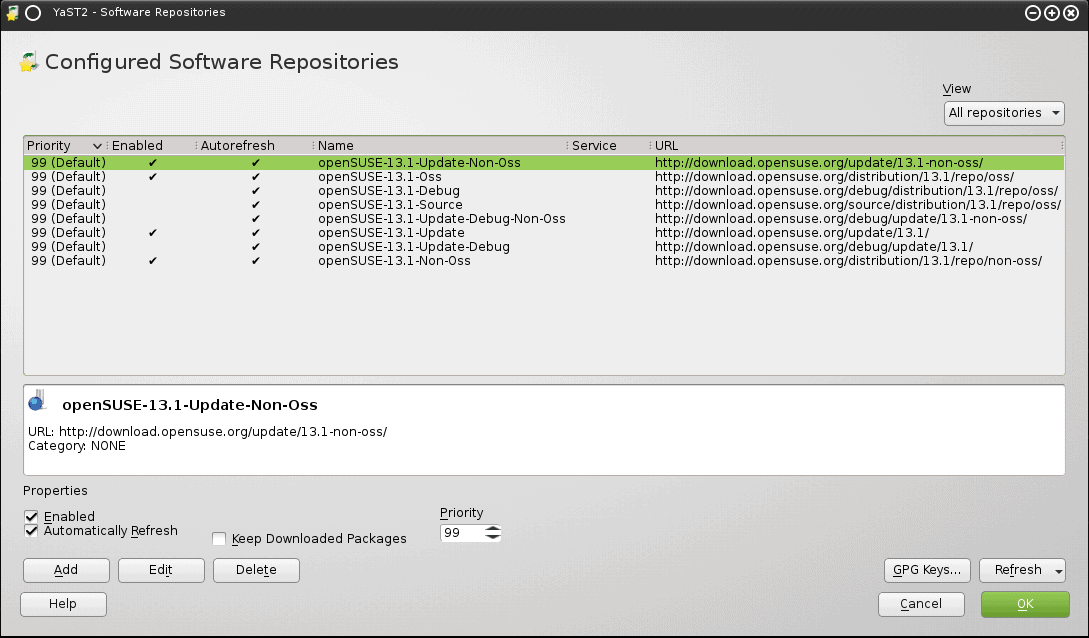
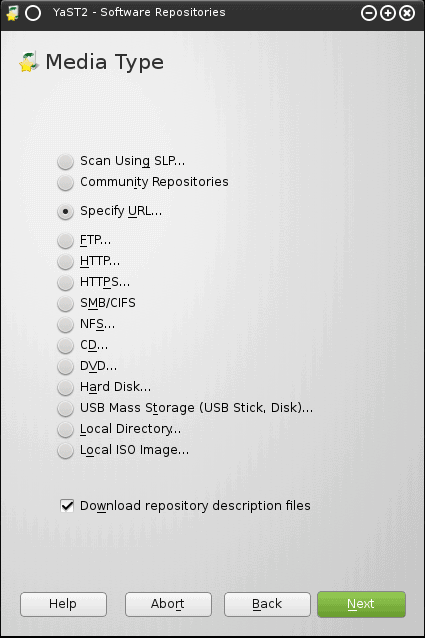
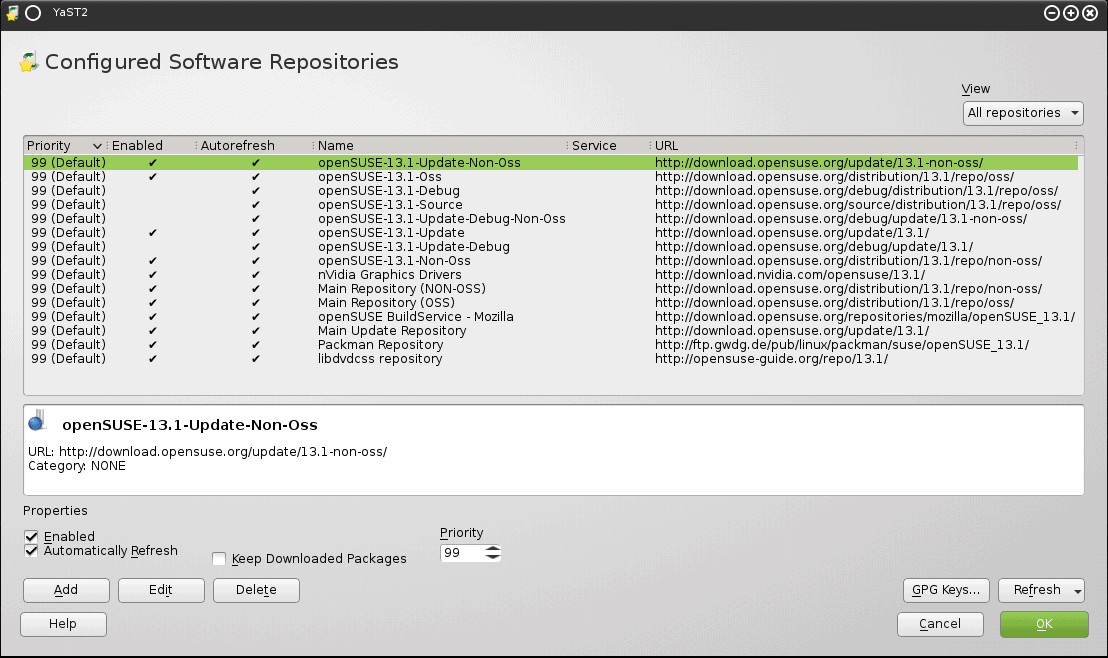
Here, you will get the list of all repositories, including enabled/disabled ones, their name and other useful information, which is almost self-explanatory. We need more, so hit the Add button at the bottom, and then select Community Repositories.
Now, in the list of online sources, mark those that you want. In our case, we want Nvidia, but you might as well choose Mozilla and LibreOffice repositories, updates, Packman, and other sources, many of which offer lots of great content. This is unto SUSE what easyLife and its extras are unto Fedora. At this stage, if you have questions about the openSUSE configuration, then you must do some homework and come back. We have to assume you have mastered all the early steps.
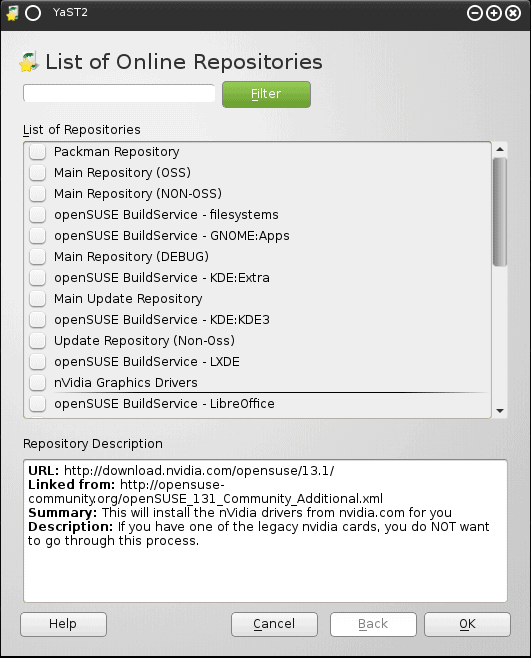
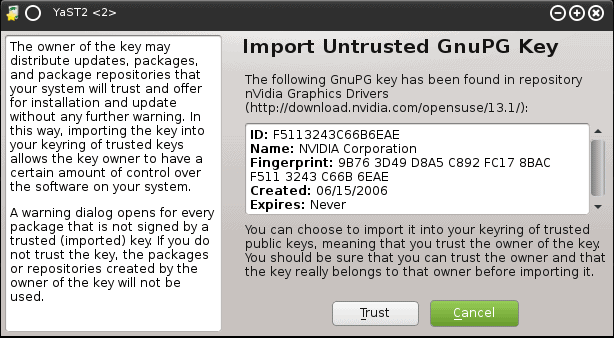
After you approve your choices, the list of online repositories will be refreshed. You will be asked to approve importing the signing keys for these digital sources. Normally, if you are doing this on your own, it can be considered a possible security compromise, as you are adding new, unknown software to your system, but if you trust openSUSE and its build mechanisms, then you are fine.
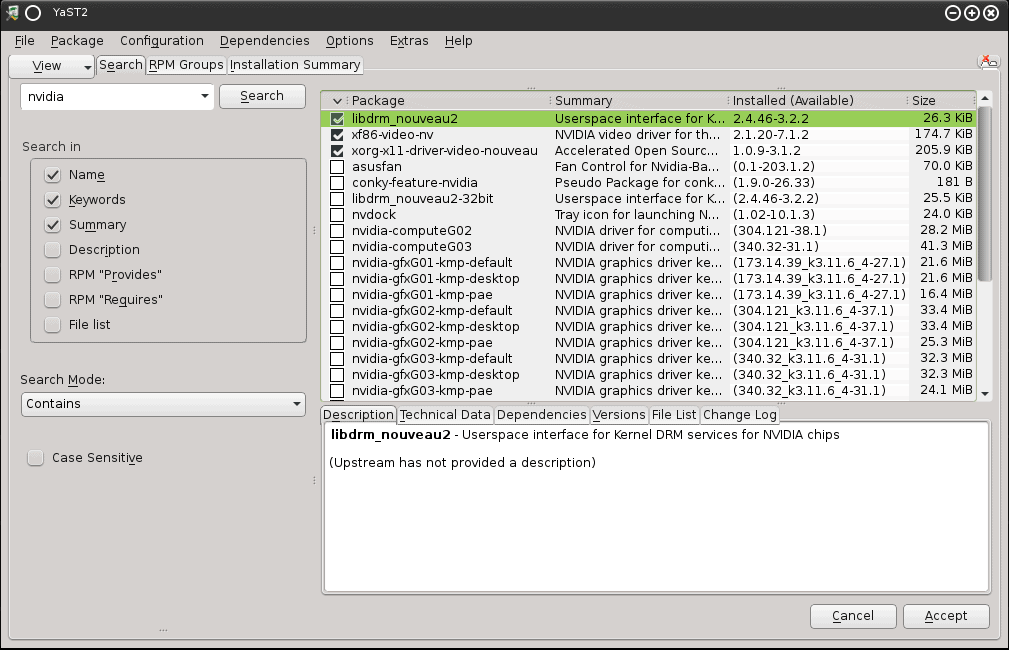
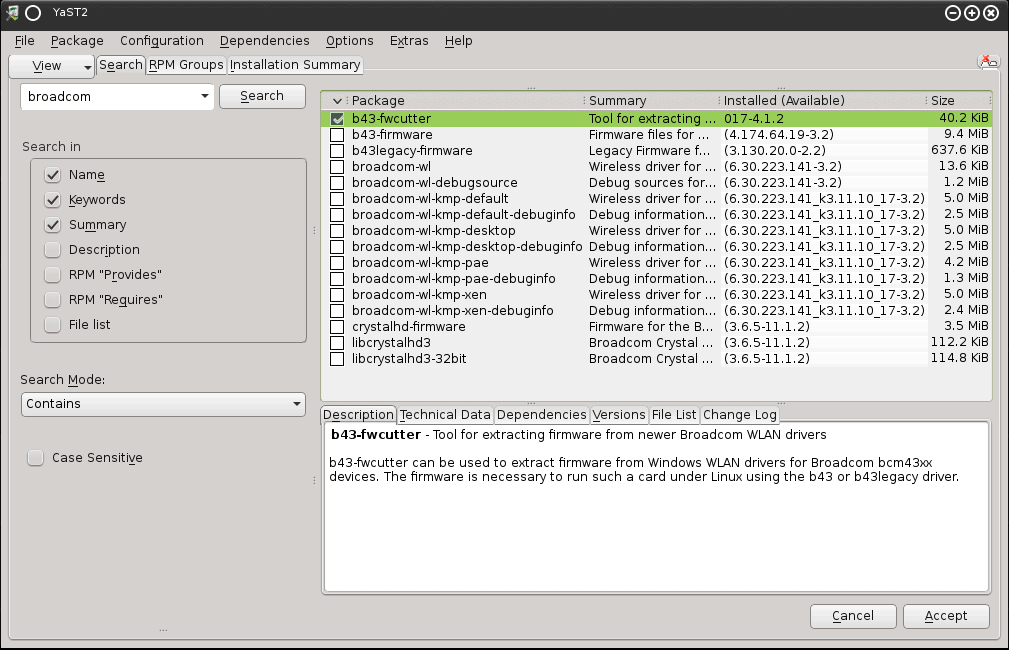
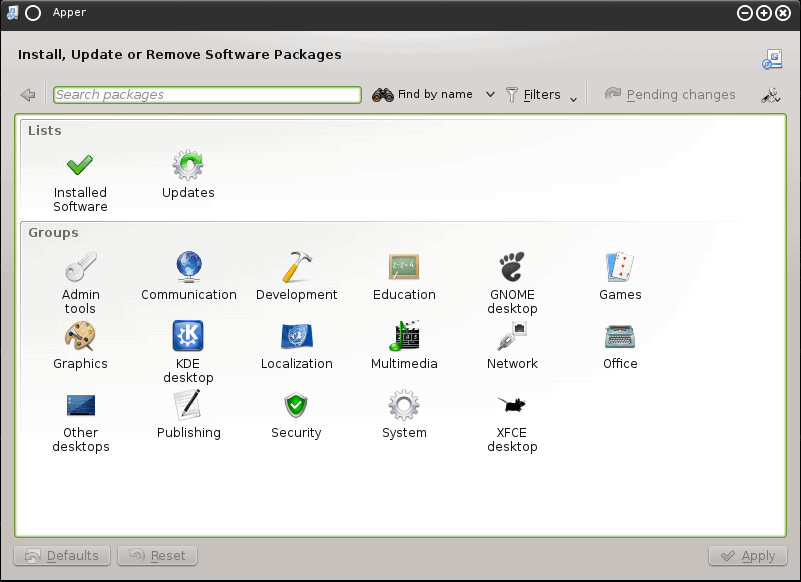
Launch the Software Management module and search for Nvidia. For that matter, you can search for other proprietary content, like Broadcom Wireless drivers. You can also use the Apper frontend to install software, if you prefer it over YaST. Remember our package management guide. There.

After the drivers are installed, reboot and enjoy! For example:

Printing
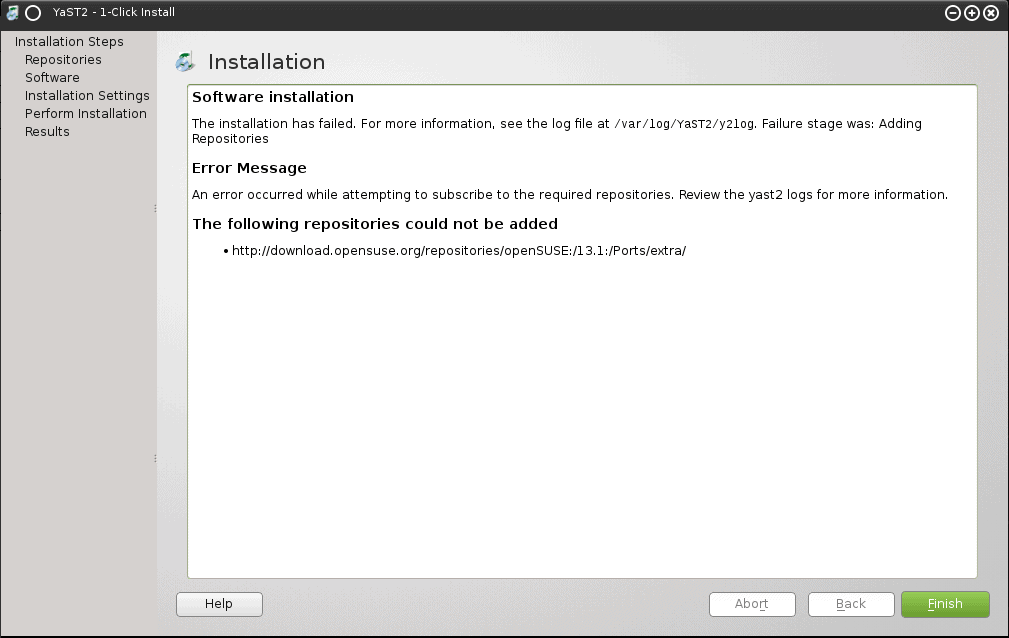
Now, here’s another hot topic. Printing. First, let me tell you we have discussed this before, at length. I have shown you many success and failure stories. It’s one of those hit and miss issues in Linux, and one of those things that can block your success, karma, nirvana, and other fancy words and emotions. It can be a reason not to move to Linux.
First, hint: the example we will be discussing today CAN be resolved. I am going to show you this in a separate tutorial soon. However, today, I want to show you that sometimes, things can go wrong. They will go wrong here. Even though we had success with printing with Ubuntu, Scientific Linux, we used a bunch of different hacks in the past to get this working, with openSUSE 13.1, the effort will be a futile exercise, trial and error, with tons of cryptic messages, online searches, installations of packages, and other ideas that will lead us nowhere. Once you get too tired, simply fire up a Fedora or Mint or some other distro, and get your printing going on in there. That’s an option, as well as a test. Which distro suits you best?
The great motivation behind my reason to show you a bad example that does not advance the Linux cause at all is manyfold. To start with, we are testing yet another distribution, good. Second, we are learning how to debug serious problems, even better. Finally, we are learning about freedom and choice. If openSUSE won’t cut it, some other distro will. And vice versa. Ultimately, you want to have a single box that does everything. But knowing them all and being able to work in all of them with equal confidence is just as useful as printing or proprietary drivers. Now, let’s fail.
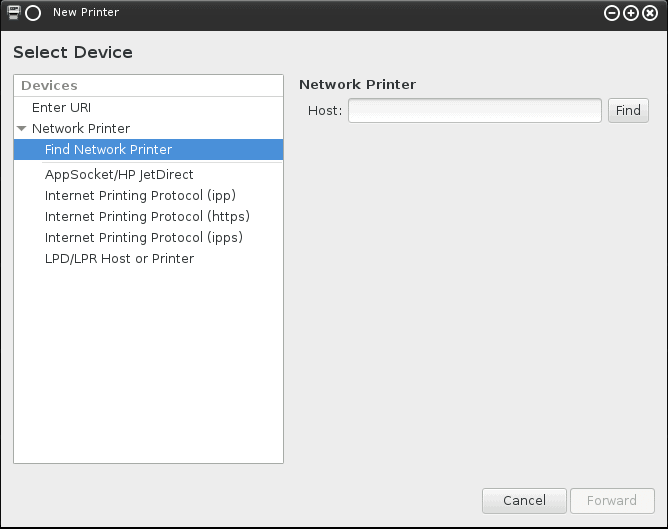
There are two ways you can configure printers in openSUSE. Type Printers in the menu. Go through YaST > Hardware > Printers. Either way works. Put in your password. Even though it reads root, in most cases, the actual expected password should be your user’s, if you have configured your user to be an administrator during the installation setup. This is the default for openSUSE.

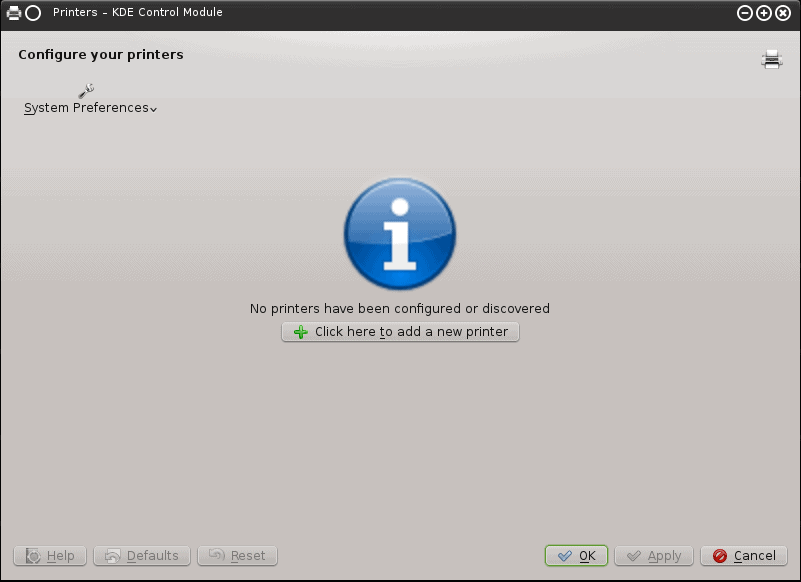
You will soon learn there’s no Samba option. For Windows users, this could be important. You might have a printer connected to another Windows box, and you need the right access. At this point, it is obvious that some packages are missing, and you will need to install them. But which ones? How does one start troubleshooting if they aren’t Linux veterans?
Additional software
Well, you can try with system-config-printer, like we saw in that Ubuntu guide. Or you might try a few online searches, which could suggest several additional packages. It’s a bit of a blind guess, I must admit, but I am telling you this as someone with a lot of experience. Don’t get angry. How do you troubleshoot Windows printing, please?
zypper install system-config-printer
If you try to run the program, though, you will fail with the following message:
/usr/lib64/python2.7/site-packages/gi/overrides/Gtk.py:49: RuntimeWarning: You have imported the Gtk 2.0 module. Because Gtk 2.0 was not designed for use with introspection some of the interfaces and API will fail. As such this is not supported by the pygobject development team and we encourage you to port your app to Gtk 3 or greater. PyGTK is the recomended python module to use with Gtk 2.0.
This will happen because the default openSUSE image is missing a critical package, and you need to install it before the utility can run. Now, how do I know this? Just copy & paste the error message into a search box in your browser, and you will get a handful of links to forum posts and Bugzilla entries. To resolve it, install:
zypper install typelib-1_0-WebKit-3_0
root's password:
Loading repository data...
Reading installed packages...
Resolving package dependencies...
The following NEW packages are going to be installed:
typelib-1_0-Gtk-3_0 typelib-1_0-JavaScriptCore-3_0
typelib-1_0-Soup-2_4 typelib-1_0-WebKit-3_0
4 new packages to install.
Overall download size: 521.6 KiB. After the operation,
additional 1.1 MiB will be used.
Continue? [y/n/? shows all options] (y):
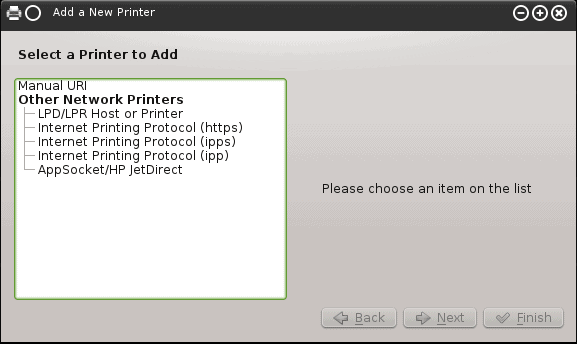
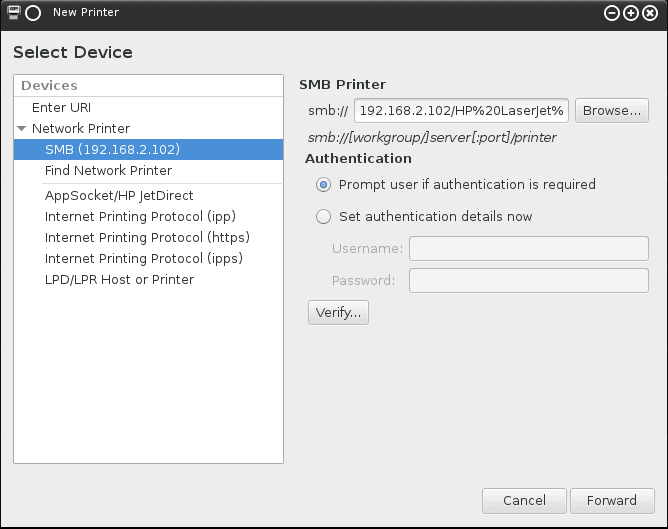
Now the tool can run. However, it also shows no Samba option. This is an underlying issue with the openSUSE build. We will really need to replenish some of the missing packages. We will use zypper, and compared to apt and yum, it’s almost identical. However, the upside is that you can find the network printer, even if the Samba discovery does not show in the menu. Only the GUI may or may not stall at this point.
One-click installs
Let us remain obstinate and keep on trying to get the Samba option to show in the window, and make sure we can complete all the steps the right way. We definitely need to install several packages, and restart our desktop session before we try the printing utility again. But which packages? For new users, the exact list can be elusive. Even for experienced users, this step is quite tricky, and consists of lots of reading online and some guesswork. But as unsuccessful as our effort is going to be, it is an important lesson in problem solving.
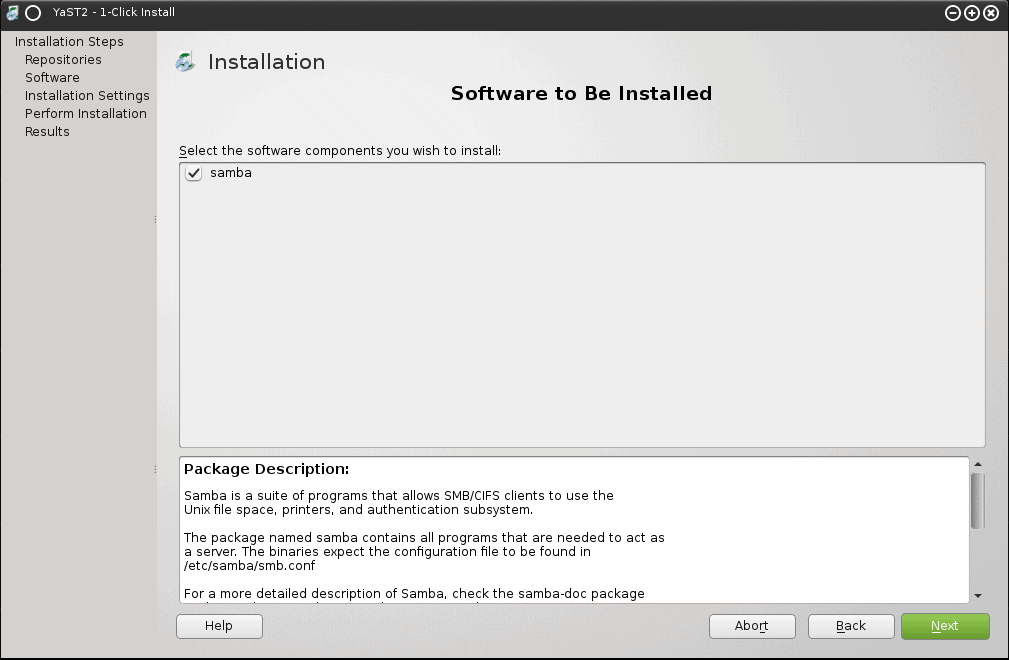
The easiest way is to use the one-click install option for Samba. OpenSUSE offers these quick-install links, which are highly useful for replenishing and configuring lots of stuff fast. For example, there are one-click installs for graphics drivers, media codecs, and other options. We have not seen them used yet, because we did not pilot openSUSE as our test bed in the previous articles, but now, you’re learning yet another angle to how to manage this distribution.
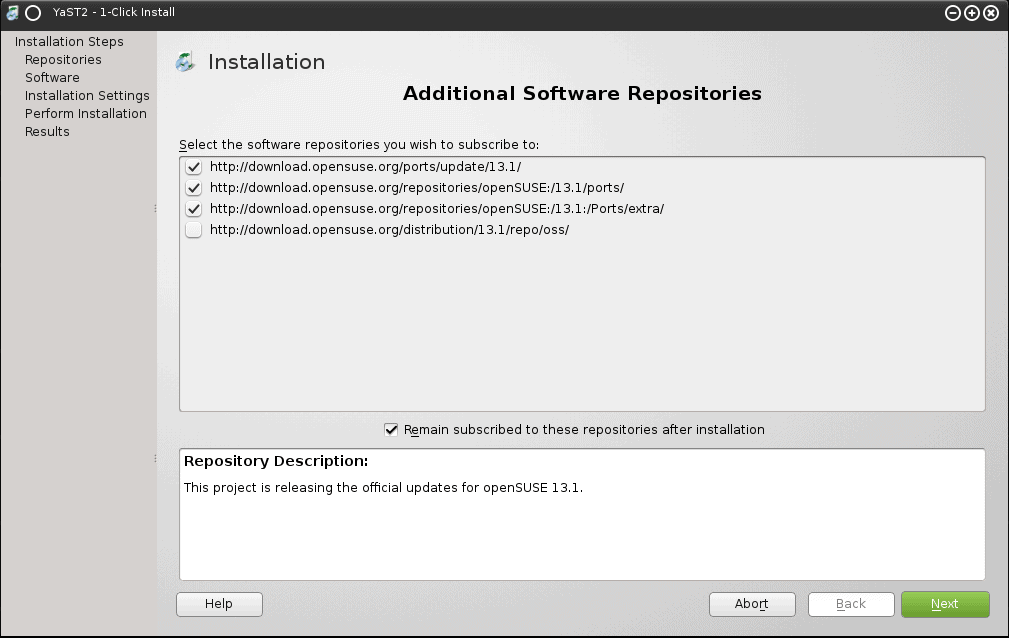
However, in this case, the repository sources will be broken and not really usable.
As a last resort, you can do some manual installs – this and other packages, but it’s magic really, so I won’t bother pasting a dozen crazy strings that mean nothing to you. Your own searches will turn a whole bunch of these, with questionable success ratings.
zypper install samba-client
But this won’t solve our issue, either. At this point, you should quit. And use a different distribution, like Mint or Ubuntu, for your printing. In fact, after we run through all the different scenarios, usage models and software categories, you should check those that do not satisfy your needs in one or more of these, and then discard them. Finally, select the one with the best functionality and looks. If printing is not an issue, then SUSE will do well for media, office and games. If you need printing, too, then you’ll be better off with Ubuntu, for instance. See the examples above. It works beautifully, out of the box. Anyhow, we will see how the distro list grows and shrinks as time goes on.
Conclusion
Managing devices and drivers on Linux is much like Windows, except the slightly different behavior and terminology. In most cases, you won’t have any problems. Installing proprietary drivers is rather easy. Configuring your peripherals works most of the time, and sometimes, not at all. I will not delude you. Linux has its woes, and some can be quite tricky to fix. But that’s also the golden beauty of Linux and its variety. If openSUSE does not work for you, you can always try a different distribution.
We learned a whole bunch of things today. On the whole, most distributions are very similar. There are some unique features in their behavior, but the basic principles are identical. Finally, there’s the matter of taste and how well it works for you. With so much choice (much choice, many detail, wow), and an ever expanding knowledge based, even though there could be problems, your freedom has never been greater. On to the next topic, but for now, you’re the master of music and video, writing and reading, games and the necessary drivers for those games, and then some. Plus, you’ve lived through a real combat trial, and one that ended in a brief defeat. But our war has not been lost. Next time, we will discuss, well, I won’t tell you, let it be a surprise. See you around.
Cheers.
Igor, I’m still waiting for video acceleration of Sandy Bridge graphics on Centos 7. Yes, it was possible on Centos 6, and it is possible on Fedora.. but I wonder how it fails in this uber stable enterprise distro. I’d be glad if you or anybody suggests me how to do it.
I will have to find a test rig to test :)
Dedoimedo
thank you very much for the assurance!
I used Linux Mint and Manjaro for about two years on my previous laptop with Intel integrated graphics and everything ran perfectly. Then I bought a new laptop with NVIDIA graphics card and eventually gave up trying to get Linux running properly on it. First, there is no proper support for switchable Optimus technology and second, even with proprietary graphics, the heat generation and fan noise is always much more than Windows.
+1
linux sucks big time on video and audio!